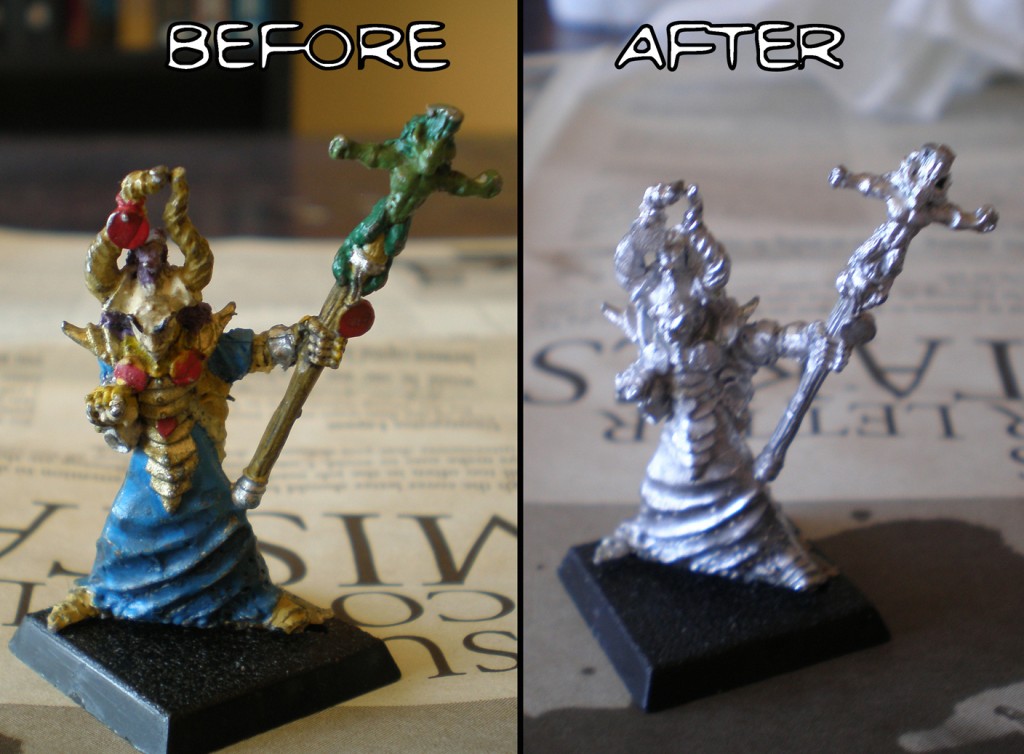
I may only be a competent painter, but a few years of buying used miniatures on eBay (as well as reclaiming some golden oldies from my own collection) has made me an expert stripper (of miniatures – my burlesque skills leave much to be desired). Since I’ve been meaning to write more about miniatures, and I just finished cleaning up a batch of old lead, I thought I would share my wisdom (if by ‘wisdom’ I mean ‘trial and error resulting in stained sinks, melted plastics and burnt fingers’).
Trial and Error
For my earliest attempt at stripping paint, I grabbed the first thing I found in my closet that looked like it would do the trick – furniture stripper. This did the trick alright, and fast, but it also completely melted the little plastic shield and crossbow that was attached to the miniature (a poor veteran of Ruglud’s Armored Orcs). The leftover goop was also problematic since you shouldn’t exactly poor furniture stripper down the drain. Seeing as how many miniatures made after ’89 have plastic parts and bases, furniture stripper (as well as any kind of paint remover or turpentine, since they have the same problem) was out.
A quick perusal of the internet revealed two likely candidates that would remove paint without harming plastics: Dettol and Simple Green. Unfortunately, in Canada Simple Green has only just become available and Dettol is hard to find. In looking for an alternative, I learned that it was these cleaners degreasing properties that made them such effective paint strippers. Around this time I had moved apartments, which meant a whirlwind of cleaning and cleaning products among which I found the ‘Andre the Giant’ of household degreasers – oven cleaner. I figured what the hell, and tried it out on a guinea pig I wouldn’t mind melting (a poorly painted henchman from the Advanced Heroquest boxed set). Lo’ and behold, it stripped the paint without harming or softening the plastic underneath.
In the years that I’ve been using oven cleaner to strip miniatures I’ve found that it has no adverse reaction with hard plastic miniatures (old or new citadel plastics – though I have yet to try it on finecast), shields, limbs, or bases (both black plastic and clear plastic flying bases). I’ve even forgotten batches and left miniatures soaking in oven cleaner for a week with no effect (other than paint removal). Oven cleaner also weakens the bond of super glue, and with a bit of wiggling, most multi-part models can be easily broken down into their parts (a big bonus if you don’t like the pose the previous owner put the figure in). The only thing I haven’t had success stripping with oven cleaner are pre-painted figures like Heroclix and D&D miniatures – it doesn’t harm the figures, but it also doesn’t affect the paint at all (for stripping these kinds of minis stay tuned for Part Two).
I may not convert the Simple Green enthusiasts, but oven cleaner is at least a viable alternative. Here’s how I do it:
Stripping Miniatures with Oven Cleaner
Oven cleaner is a lot safer to handle than something like furniture stripper, but it’s still potentially dangerous and should be treated with care (no matter how much its lemony fresh scent lulls you into complacency).
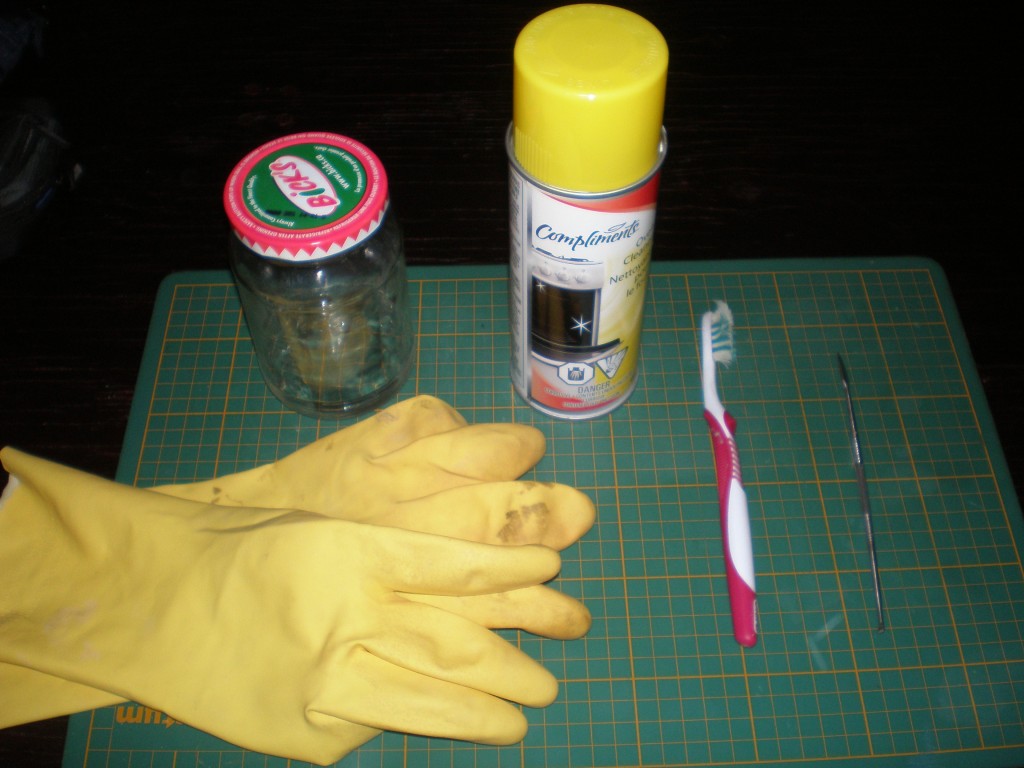
What You’ll Need: a spray can of oven cleaner (go for the cheap stuff, ‘extra strength’ if possible), a sealable glass jar, rubber gloves, an old toothbrush (you can reuse it for your next batch of minis, but don’t even think of putting that thing near your mouth again), and something pointy (I use a Citadel modelling tool or a toothpick). You are going to want to perform this operation in a well-ventilated space, with a sink you won’t get killed for accidentally staining (like a basement laundry sink).
I know what you’re thinking, ‘gloves are for pussies’ – sure, oven cleaner won’t immediately burn your skin like other paint strippers, but it’s still pretty harsh. Harsh enough that I wouldn’t think of touching it without gloves on, and this is coming from a guy whose parents washed his hands with turpentine when he was a kid.

Method: put the miniatures to be stripped in your jar (I usually do 4-6 at a time, but any number is good as long as the jar isn’t filled past the halfway point). Don’t worry about removing shields or bases if they are attached to the mini or covered in gunk, the oven cleaner will help to loosen everything up so that after cleaning, your used miniatures will look like they just came out of the blister pack.
Put on your gloves and start spraying oven cleaning foam into the jar, over the miniatures, until the jar is full. Don’t stick your face right over the thing or you’ll get a snootfull of caustic gas – green dragon breath anyone? (I only pass on what my own stupidity has taught me). Seal the lid and wait a few minutes.
The foam should have settled into a sludge at the bottom. Repeat a few times, sealing the jar in between each coating. Don’t worry if that bottom sludge hasn’t completely engulfed the minis – after a few sprays, even the exposed minis should be coated with a layer of the stuff. Seal the jar again and put it away some place kids (if you have any), significant others (if you have any), and clumsy people (you- if you’re like me) won’t knock it down.
Give the miniatures a few days to soak. Put on the gloves, open your jar and remove your miniature, which by now looks like the leavings of a gelatinous cube. Using your old toothbrush, gently scrub the surface of the miniature, trying to get into all the nooks and crannies. Scrub away from yourself and downwards – this will prevent sludge from flying all over you (and your eyes) and bespeckling the wall behind your sink (again lessons learned only through trial and so many errors). If the miniature has a shield or other parts, they usually detach at this point, so be careful not to send them down the drain. Rinse the whole thing in warm water and inspect the mini to make sure you’ve gotten all the paint off. Sometimes you’ll have to go over it again with the toothbrush, sometimes the paint (or a cap of superglue) is stubborn and needs to be scraped a bit with your pointy object (toothpicks are your safest bet). Rinse again and leave it on a sheet of paper towel to dry.
When you are done, rinse out your jar of any remaining goop, being careful it doesn’t contain any small pieces (like crossbows and shields) that detached during the soaking. Even if you’re using a laundry sink you should also rinse it out afterwards, otherwise detached paint particles have a habit of sticking to the sides and are a pain to get rid of once the dry on.
Voila – you’d never know that batch of minis you got off eBay once looked like the product of a fresco ruining grandmother (listed as ‘pro painted’ of course). In part two I’ll tackle removing the paint from pre-painted miniatures (which also sometimes look like they were painted by the previously mentioned grandmother).
Tags: How-To
